Hello world in TwinCAT C++

Let’s discover the world of C++ programming in TwinCAT. Normally a PLC is programmed in any of the 5 languages defined in IEC 61131-3. It is also an option to write code in C++ or Matlab in TwinCAT. To better understand the possibilities of these additional languages, I will port some older code to run on a PLC. But before that, we start with creating a first Hello world project.
It’s good to note that this guide is me sharing my own learning journey. Meaning it can contain mistakes. If you find any mistake or have anything useful to add, don’t hesitated to drop a comment below.
Setup
- Engineering environment
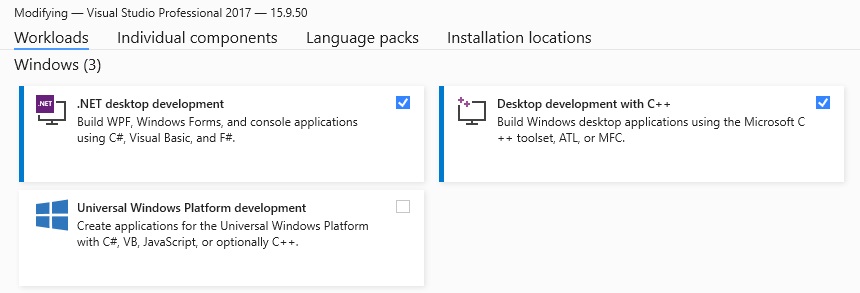
Writing and building code in C++ for TwinCAT is only possible by using Visual Studio. The XAE shell doesn’t support it, unless the module is fully build and you are only calling it. Make sure that the ‘Desktop development with C++’ is installed by going to Tools > Get Tools and Features... in VS.
Code written in C++ for a TwinCAT system will run in the kernel space of the computer. For this reason the code needs to be signed to trace its origin. A self signed certificate can be used for development if the target is set to test mode. For production environments you will need to create a certificate that is counter signed by Beckhoff. For now we stay with a self signed certificate.
 In the toolbar, go to
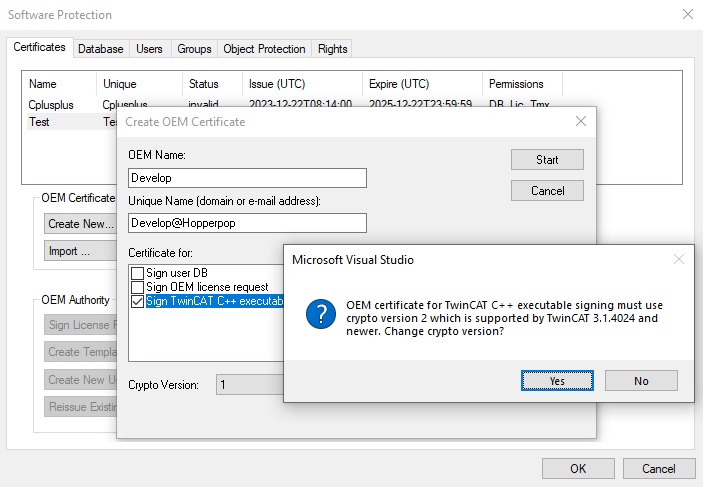
 TwinCAT > Software protection > Certificates > OEM Certificates and press Create New.... Fill in a name and tick the Sign TwinCAT C++ executable. When it asks you to change crypto version, press yes. Click the Start button, and select the location where to save the certificate. After that a pop-up will request a new encryption password. Make sure you save this password. The certificate will now appear in the list. Note that its status remains invalid.
- Runtime environment
As we are using self signed certificates, we need to prepare the runtime environment to accept these. I will use TC/BSD running in a virtual machine. To learn more about this topic, visit Roald’s post.
After your TC/BSD is up and running, you will need to edit a file on it. For that I prefer to use the nano editor. If it’s not installed, install it by running the following command:
doas pkg install nano
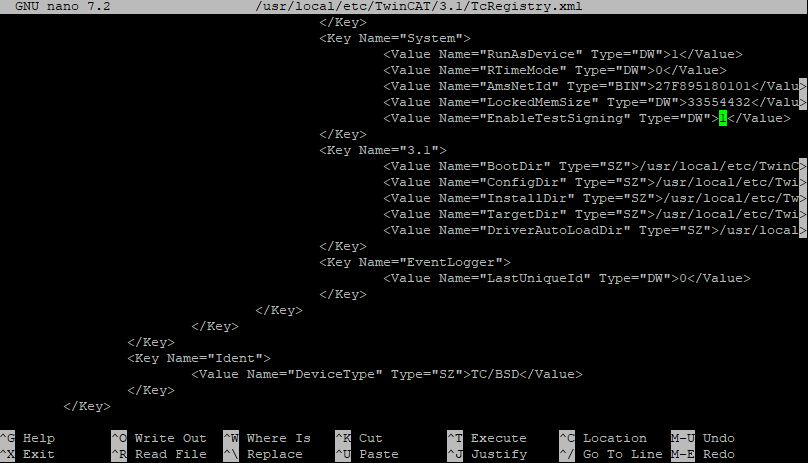
With nano installed, change in the TcRegistery.xml file, EnableTestSigning under the key System to 1.
nano /usr/local/etc/TwinCAT/3.1/TcRegistry.xml
Press CTRL + X to save the changes, and Y to confirm. Restart the TwinCAT system to apply the new settings:
doas service TcSystemService restart
Later we will need to accept the self signed certificate on the TC/BSD machine. But for that we first need to create and deploy our first C++ project.
Hello world!
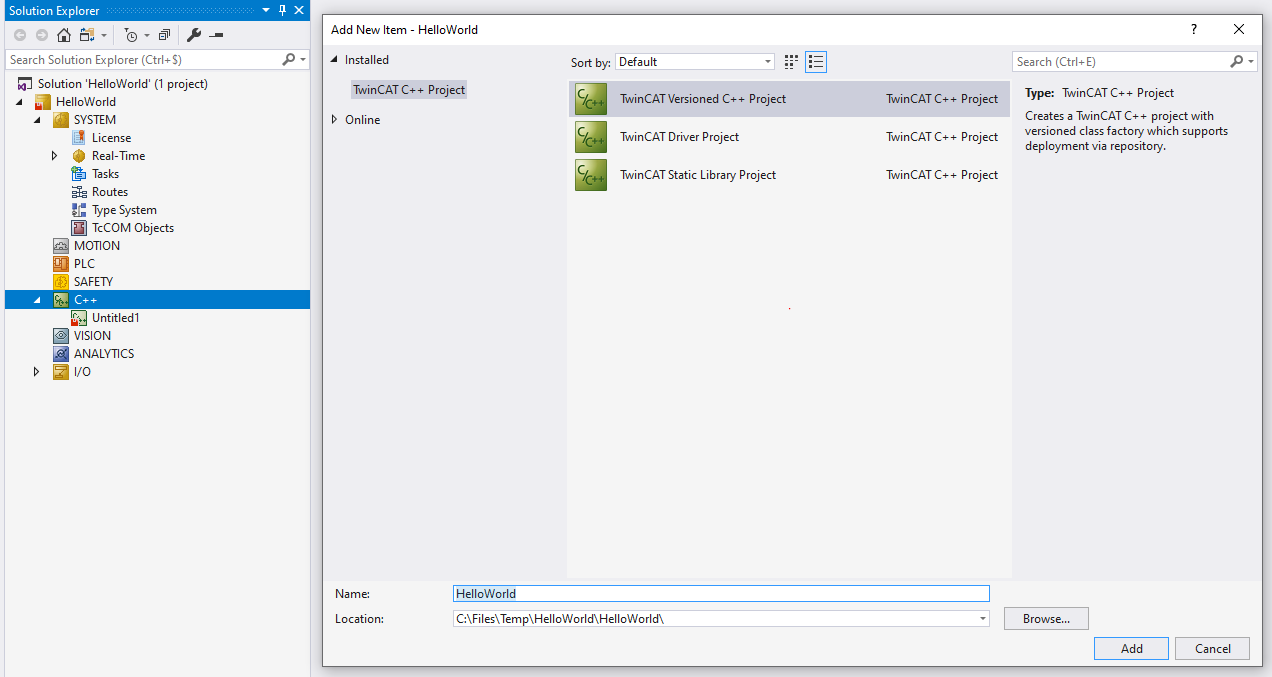
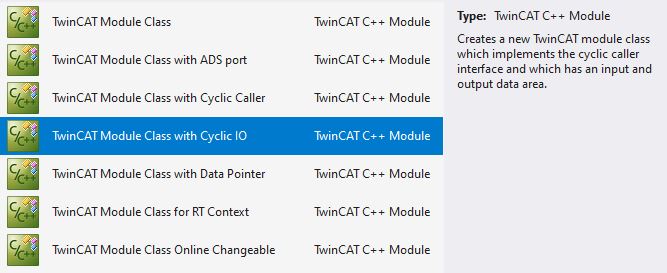
Create a new TwinCAT project in your Visual Studio editor. By right clicking on C++ in the solution tree, you can add a new item. Chose the TwinCAT Versioned C++ Project and give it a name. Next you can chose between different templates to start from, and there we go for Cyclic IO as this will give us the possibility to have input and outputs to our module. Note that all these features can be added later manually.
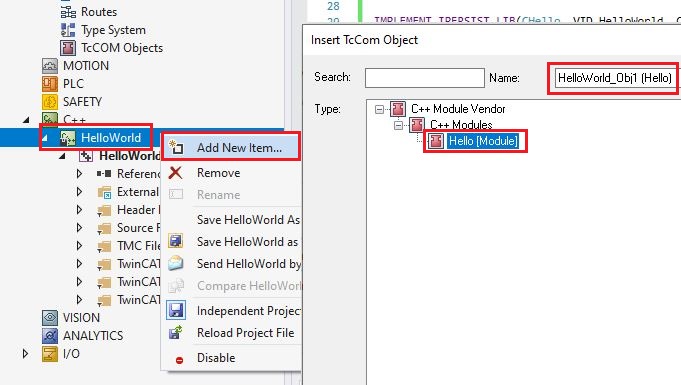 Before adding any extra functionality, let’s make sure that this basic module can run. Add a TcCom object of our fresh created module to the project. It doesn’t know yet in with task it needs to run. Create a new task in the system manager if you don’t have any. And link the task to the module by going to
 Context > Result > Task when selecting your new TcCom object. 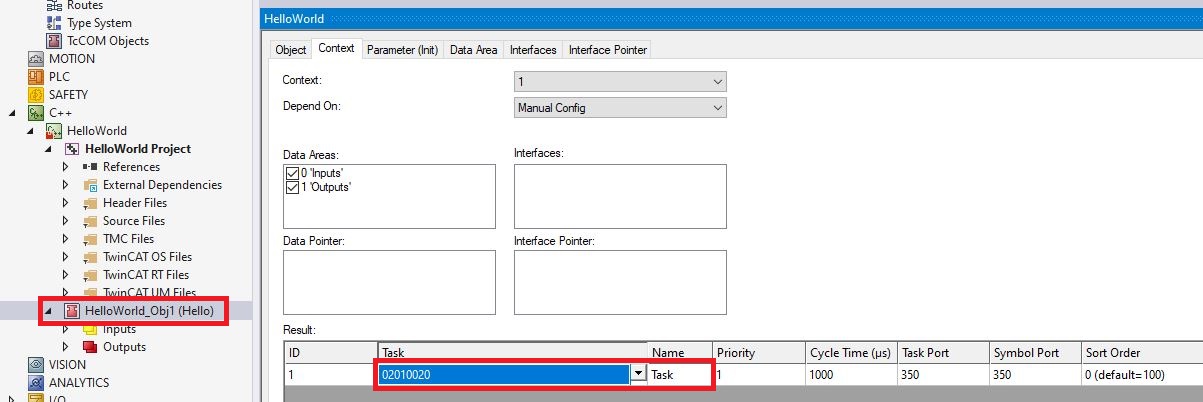
After deploying the project, we get a 0x706 Ads error. The console give us more information and talks about a mismatching checksum. 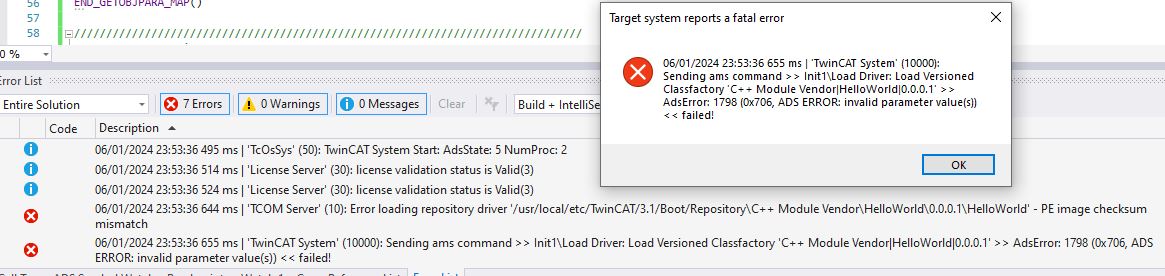
Open the project properties and enable TwinCAT signing under the TcSign tab. In addition, fill in the name of the certificate that we created before and the password. 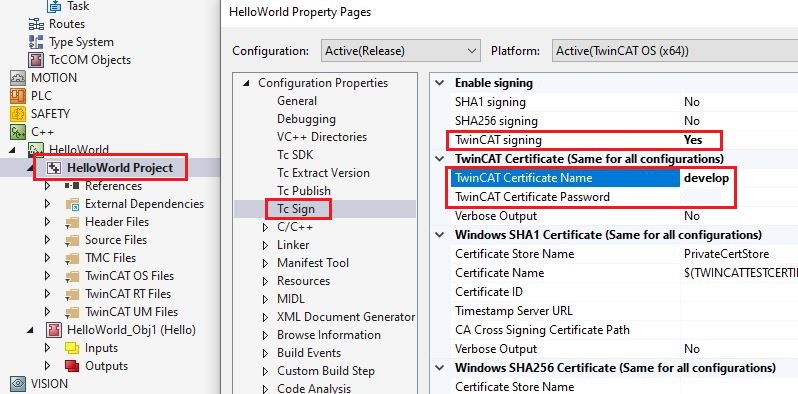
The password gets stored in plain text into the project with could be dangerous if shared with others. Beckhoff has a solution by offering the TcSignTool. With this tool you can store the password in the registry of the computer outside the project.
When trying to deploy for the second time, we get an error saying that the certificate is not in the trusted list. 
For this we need to go back to our Tc/BSD console. Install the Tcimportcert by running:
doas pkg install tcimportcert
Trust the certificate found in the OemCertificates folder and restart the TwinCAT system service.
# list the files under the certificate folder
ls /usr/local/etc/TwinCAT/3.1/Target/OemCertificates
# trust the certificate that was created
doas tcimportcert /usr/local/etc/TwinCAT/3.1/Target/OemCertificates/Develop.reg
# restart TwinCAT
doas service TcSystemService restart
If everything went well, the project should now be deployable. When setting the Inputs.Value to 1, the Outputs.Value should count up by 1 every cycle.
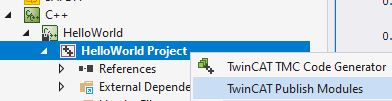
If you are happy with your module you created, you can publish it. This will make it possible to add the module to any of your other projects without the need of the original code. The builded code will be stored under the default C:\TwinCAT\3.1\Repository\ path. By changing the Vendor information, image and version number in the .tcm file, you can adjust how the module will appear in the TcCom repository.
Slot word
And there you have it, your first C++ module in TwinCAT. You can find more documentation on Beckhoff’s Infosys. As it contains a lot more details, it’s harder to get starting. Hope this small guide can help you with your first steps in TwinCAT C++.